A tent that leaks can turn a simple rainy night into a wet, uncomfortable trip. Fortunately, many leaks can be prevented—or fixed—before you leave home.
Waterproofing a camping tent usually means doing one or more of three things: sealing worn seams, restoring a damaged waterproof coating, or refreshing the outer water-repellent finish. The right solution depends on where the water is getting in.
Quick answer
To waterproof a tent:
- Set it up and inspect it in dry conditions.
- Clean dirt and debris from the fly and floor.
- Reseal leaking seams with the correct seam sealer.
- Restore the waterproof coating if it is peeling or flaking.
- Refresh the outer water-repellent treatment if water no longer beads on the fabric.
- Let every treatment dry fully before packing the tent away.
First, find out where the leak is coming from
Do not apply every treatment automatically. Inspect the tent first and look for these common warning signs.
Water is entering through a seam
If water appears along stitching, corners, or the edge of the floor, the seam seal may be worn or damaged.
The inside of the fly or floor is peeling
Flaking, sticky, or cracked material on the inside of the rainfly or tent floor usually means that the polyurethane coating is failing.
Water no longer beads on the outside
If rain soaks into the outer fabric instead of forming droplets and rolling off, the durable water-repellent finish may need to be refreshed.
The tent is wet inside but there are no visible leaks
This may be condensation, not a leak. Condensation happens when warm, humid air inside the tent meets a cold tent wall. Improve ventilation before assuming the tent has failed.
What you need
Prepare the following before you start:
- A clean cloth or sponge
- Rubbing alcohol
- A tent-specific seam sealer
- Waterproofing treatment suitable for your tent fabric
- A soft brush or cloth for cleaning
- A dry outdoor space or well-ventilated area
- The manufacturer’s care instructions
Always check whether your tent uses polyurethane-coated or silicone-treated fabric. These materials require different sealers, so using the wrong product can create more problems.
Step 1: Set up and inspect the tent
Pitch the tent fully in a dry place. Install the rainfly and check the floor, corners, doors, zippers, vents, and all seams.
Pay special attention to the underside of the rainfly, the inside edges of the tent floor, floor corners, door seams, and areas where the fabric looks sticky, cracked, or worn.
Step 2: Clean the tent before waterproofing
Dirt, dust, body oils, and tree sap can reduce water repellency. Clean the tent gently before applying any waterproofing product.
Avoid harsh household detergents, bleach, washing machines, and tumble dryers. These can damage coatings and weaken water repellency. Use a tent-specific cleaner or follow the manufacturer’s instructions. After cleaning, rinse carefully and allow excess water to drain.
Step 3: Reseal worn tent seams
- Set up the tent in a dry, well-lit area.
- Inspect the seams on the underside of the rainfly and the inside of the tent body.
- Remove only loose or peeling seam tape. Do not pull away tape that is still firmly attached.
- Wipe the seam area gently with rubbing alcohol.
- Apply the correct seam sealer in a thin, even layer.
- Let it dry completely before folding or using the tent.
If one seam is failing, inspect the others. It is often more efficient to reseal all major seams at the same time.
Step 4: Restore a peeling waterproof coating
A waterproof coating can eventually fail, especially on older rainflies and tent floors. Signs include peeling flakes, sticky fabric, or water soaking through material that has no seam damage.
- Lay the rainfly or tent floor flat.
- Gently remove loose, flaking coating as directed by the sealant manufacturer.
- Clean the surface carefully.
- Apply a thin, even layer of tent-specific coating.
- Leave the tent open and allow the coating to cure fully.
Do not rush this stage. Packing a tent before the coating has dried can cause fabric to stick together and undo the repair.
Step 5: Refresh the water-repellent finish
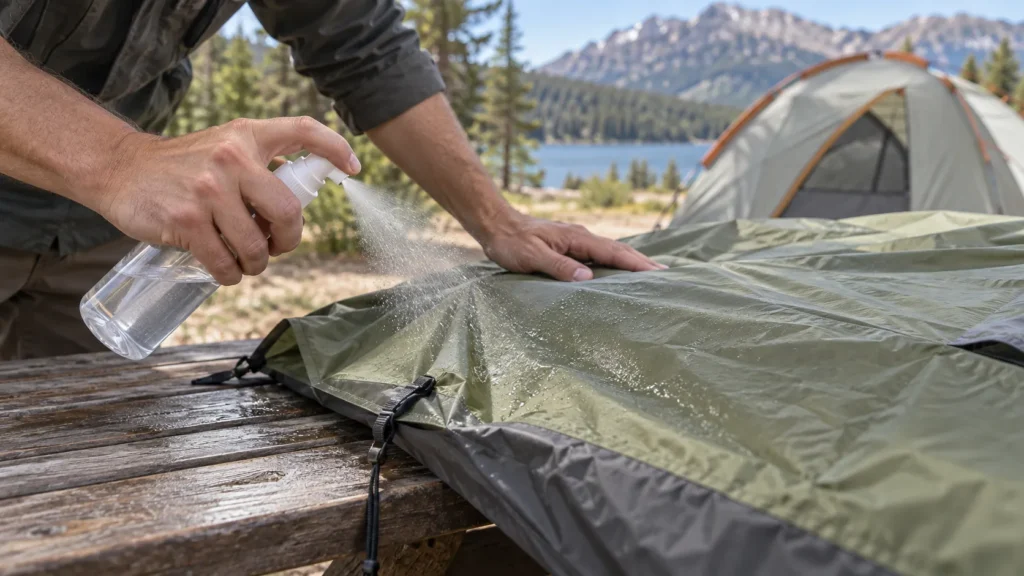
The outer surface of a tent should encourage water to bead and roll away. When water starts soaking into the fly fabric, refresh the durable water-repellent finish.
Many tent treatments are applied to a clean, wet tent. Follow the instructions on the exact product, but the general process is to pitch the tent or lay it flat, apply the treatment evenly to the exterior fabric, pay attention to exposed areas and seams, wipe away excess, and air-dry completely.
For synthetic tents, use a treatment intended for synthetic outdoor fabrics. Canvas and polycotton tents require different products.
Step 6: Test the tent before your trip
After all treatments have dried, test your work before going camping. Use a hose with a gentle spray setting and check seams, floor corners, doors and zippers, the rainfly, and any previously damaged areas.
Do not use a high-pressure spray, as that does not represent normal rainfall and can force water through areas that would otherwise perform well.
Prevent leaks in the first place
- Always dry your tent completely before storage.
- Store it in a cool, dry place.
- Avoid setting up in a dip or low area where water collects.
- Use a footprint that fits underneath the tent floor; it should not extend beyond the edges and collect rainwater.
- Stake out the rainfly and guylines properly.
- Keep vents open when conditions allow to reduce condensation.
When should you replace a tent instead?
A repair may not be worth it if the fabric has severe UV damage, multiple large tears, broken poles, persistent coating failure, or widespread mildew.
If your tent is no longer dependable for rainy camping, see our Best Waterproof Tents for Rain guide before buying a replacement.
Frequently asked questions
Can I waterproof a tent with household products?
It is better to use tent-specific products. Household sprays, detergents, and sealants may damage coatings or reduce breathability.
How often should I waterproof my tent?
There is no fixed schedule. Inspect it before every camping season and re-treat it when water no longer beads on the fly, seams begin leaking, or coatings show visible wear.
Is condensation the same as a leak?
No. Condensation forms from moisture inside the tent. Improve airflow with vents and doors before deciding that waterproofing has failed.
Should I waterproof a new tent?
Usually not. A new tent should already have functional coatings and sealed seams. Inspect it before the first trip and follow the manufacturer’s guidance.
Our Final Verdict
Waterproofing works best when you diagnose the problem first: reseal leaking seams, restore a failing coating, or refresh the outer water-repellent finish. Let every treatment cure fully, test the tent gently before the trip, and replace it when damage is widespread or the structure is no longer dependable.
Choose a rain-ready replacement tent →